 Today we made pine cone gnomes. I have this pine cone wreath that has seen better days and a collection of wooden balls I bought super cheap that I’ve been wanting to use. This cute little craft will require a dash of creativity, a little bit of time and use both of these supplies!
The kids will enjoy playing make believe with these or playing little pranks on their family and they really were quite simple to put together. This morning, I sprayed our pine cones with a glitter spray I had left over from another project. I just like the pizzazz glitter adds and found that when I tried to sprinkle regular glitter on the pine cone, it wouldn’t stick, disappeared into the pine cone or just clumped on glue … not a look I care for.
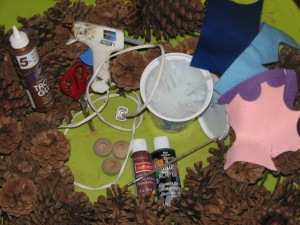
You’ll need:
hot glue & tacky glue, a wooden ball for each gnome (ours were .5 inches approximately), coloured felt scraps, pipe cleaner, folk art paint, pine cone(s), scissors, needle and thread (or embroidery needle & floss).
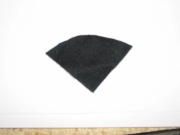
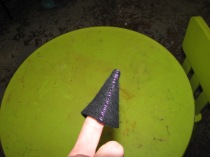
First we cut the felt to make a cone hat and sewed the two straight edges together to form the hat. Our kids find using embroidery floss and needles a little easier than regular needle & thread, but either is fine. If you are doing this with a younger child, you could even glue the felt, but need to allow it sufficient time to dry.
Then we used hot glue (or you could use tacky glue) to attach the hat to the wooden ball head.
Next we cut out a small, narrow heart shape to use as feet and two little mitten shapes for hands. If you have a narrow heart punch or die, it would be perfect for this job. We also cut a pipe cleaner in half and attached a mitten cutout to each end (with hot glue for drying time’s sake) and then put all the cutouts to the side.
We trimmed the bottom of our pine cone a bit to ensure it would sit flat. I did this part because it involved an exacto knife and I prefer the kids don’t handle the blades. A suggestion from the original tutorial was to use a piece of cardboard as a shim to make a smooth bottom. We didn’t find we needed to do that once we added a cutout of felt for feet, which we hot glued onto the bottom of the pine cone.
Then, we wrapped the pipe cleaner through the pine cone “branches” near the top and used a dab of glue at the back to secure it. We glued the wooden ball head (with hat already glued on) onto the top of the pine cone.
Lastly, we used fine paint brushes and folk art paint to add facial details. You could also use markers or pencil crayons to add these details too, but we’re a group who love to use paint!
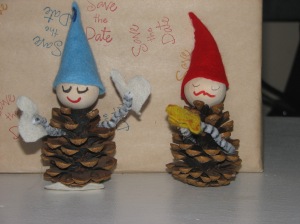

Cute right? In the spring time, I’m going to place a few in the gardens around our house, but these could also make a nice gift topper or even a Christmas ornament. What do you think?
Until next time: Inspire…Imagine…Invent!
